Showing posts with label My Creations. Show all posts

Friday, May 14, 2010

My new project!!!


So I had this idea that I wanted to make my mom a jewelry hanging board for Mother's Day. This is what I came up with. I already had some wood in my basement. It just happened to be pre-cut from another project, so I sanded, painted and added hooks for lots of Jewelry to hang on. These pictures are not the best, but this was a really fun project. Definitely making some for myself next time.

Sunday, September 27, 2009

Invites for my daughters birthday.


I grabbed some cute scrap paper a few brads, flowers and glue dots and before I knew it I had 6 cute invites to send out, and it only took me about 30 minutes. The one product that made this so quick and easy was GLUE DOTS, I've been using them for a few years now and I highly recommend them. They make paper crafting so much more enjoyable and alot less time consuming.

Wednesday, September 9, 2009

Dragon Cake


You can do this! I made this cake for my sons 7th birthday in May. It turned out really cute and it wasn't hard at all, I had so much fun. These pictures don't show the wings, but I did get them on after and I also added the fruit roll-up fire coming out of his mouth, not shown. You can find the instructions for this cake at Family Fun Here.

Tuesday, August 25, 2009

Flower Fairies


I saw this cute Idea on Paint Paper and Crafts a few weeks ago, and decided to make some for my daughter. I did change some things to make it my own but I think they turned out pretty cute. I'm new to this whole tutorial thing so bare with me, my photo skills kind of stink.


Items you will need:

-One package of regular pipe cleaners(fuzzy sticks) any color (Arms and Body)
-One package of sparkly pipe cleaners (Wings)
-Silk Flowers any size (Fairies Dress)
-One package of wooden beads (not shown) Sorry
-Embroidery floss, any color (fairies Hair)


Start by taking one piece of pipe cleaner (fuzzy sticks) and bend it in half.


Take one wooden bead and thread it through the folded fuzzy wire, leaving a small loop at the top.


Next take the silk flower off of it's steam so all you have is the flower part. Stick both fuzzy wire ends through the base of the flower at the same time.


Caution: It's tough to pull the wire through, this is where a pair of pliers does the trick.


See she's starting to look like a fairy, kind of.
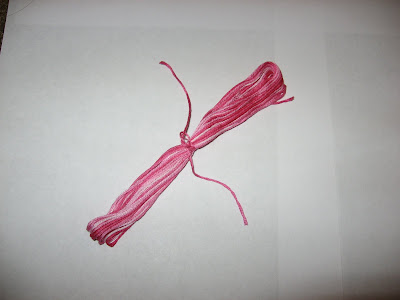


Take some (not all) of the embroidery floss (just right out of the package, as is) and tie a little knot in the center.


Trim the ends of the thread.


Cut the loops at the ends so the hair appears more realistic.


Thread the floss through the top loop above the head and pull the wire down snug to keep the hair in place.


Now trim her legs so they don't stick out of her skirt.


Next take a small piece of fuzzy wire and wrap around her midsection then bring around to the front to make her arms. (Sorry I still don't know how to turn pictures the way you want them to on here).


To make her wings, take one piece of sparkly fuzzy wire and twirl it up with your fingers to make it look like this.


Take a small piece of fuzzy wire to attach the wings to her body, wrap around until the wire is in the back.


There now your done, look how cute she turned out. At this point you can decide if you want her to have a face or not, just draw one on if you like or leave it as is.


Monday, August 3, 2009

From Office to Little girls paradise.


I have been working on my little girls room for a few weeks now, here are some things I have found to decorate it. It's not quite finished yet, I still need to get a mattress for her big girl bed and paint a few owls on the wall. Stay tuned. More to come soon.

Monday, July 27, 2009

Chip Board Christmas Decor


I have a few things that I've made in the past that I will be posting, this is one of them. I'm sorry if the tutorials pictures are not up to par, but I did not take step by step pictures back when I made it so bare with me. I also know it's not Christmas yet but it's never to early to start planning right. I made this last year and gave it out as a fun Christmas gift.

Step 1: Buy a piece of chip board any size you want
Step 2: paint it any color you would like, I picked red because of Christmas
Step 3: I printed out some cute clip art that I downloaded at PC Crafter. Christmas of course.
Step 4: Decoupage the Images onto the chip board, be careful the ink from the image can run a little so don't go over it to much.
Step 5: Add ribbon for hanging or any other embellishment, like buttons or glitter.
There you have it an easy cute Christmas gift. Happy Crafting!

Saturday, July 25, 2009

How to make a play shield.


I made this for my son last Halloween, he was a Nintendo character named Link, it was really quite easy and he has played with it ever since.

Instructions:

Step 1: Google the Internet for Knights Shields and click on Images. Find a shield picture that you like the best. Try to find an Image that is large, flat and clear in pixels when you click on it, and then print it out.

Step 2: Next take the Image to the copy store to have it Enlarged and printed on cardstock. The largest they could make it using one full sheet of paper was 11 " by 17" which is a good size for a little boy. Cut it out and then have the copy store LAMINATE it. This cost was about $3.00.

Step 3: Then I went to Roberts Crafts and bought a sheet of foam board. It is about 1/2 thick and it only cost was a couple of dollars. I then placed the shield on top of the foam board and traced around it with a pencil. I cut out the shape of the shield with a craft razor, very carefully.

Step 4: After that I wanted to make the edge of the shield smooth so I used wide clear packaging tape all around the whole thing to seal the edges.

Step 5: Next I mounted the laminated shield onto the foam board using glue dots purchased at Roberts.

Step 6: On the back I just used some duct tape to make a handle to hold on to it.

And that's it. It really didn't take very long at all and I have one excited boy who had a shield to go with his costume.

Friday, July 10, 2009

Magnet Madness!


These are so cute! I wanted to find something to decorate my daughters bedroom and this is what I found at treyandlucy. I bought the magnet board at Roberts and painted it this cute pink color and then I bought some bubble glass, fabric and magnets to make these cute magnets to go on the board. It looks so cute in her room, now I just have to hang it, but where?